 |
| Experiment with color mixing and traveling water! Visit All for Kids to check out their experiment (featured above)! |

783 original hands-on activities for kids (as well as a compiled archive of ideas from all over the web) with a strong focus on inquiry, design thinking, problem-solving skills, imaginative / creative thinking, nature, drama, learning with movement, music, arts integration and PLAY! - Creative Genius Kids! - for teachers and homeschoolers
Wednesday, December 21, 2011
Traveling Water
Discovery Bottles
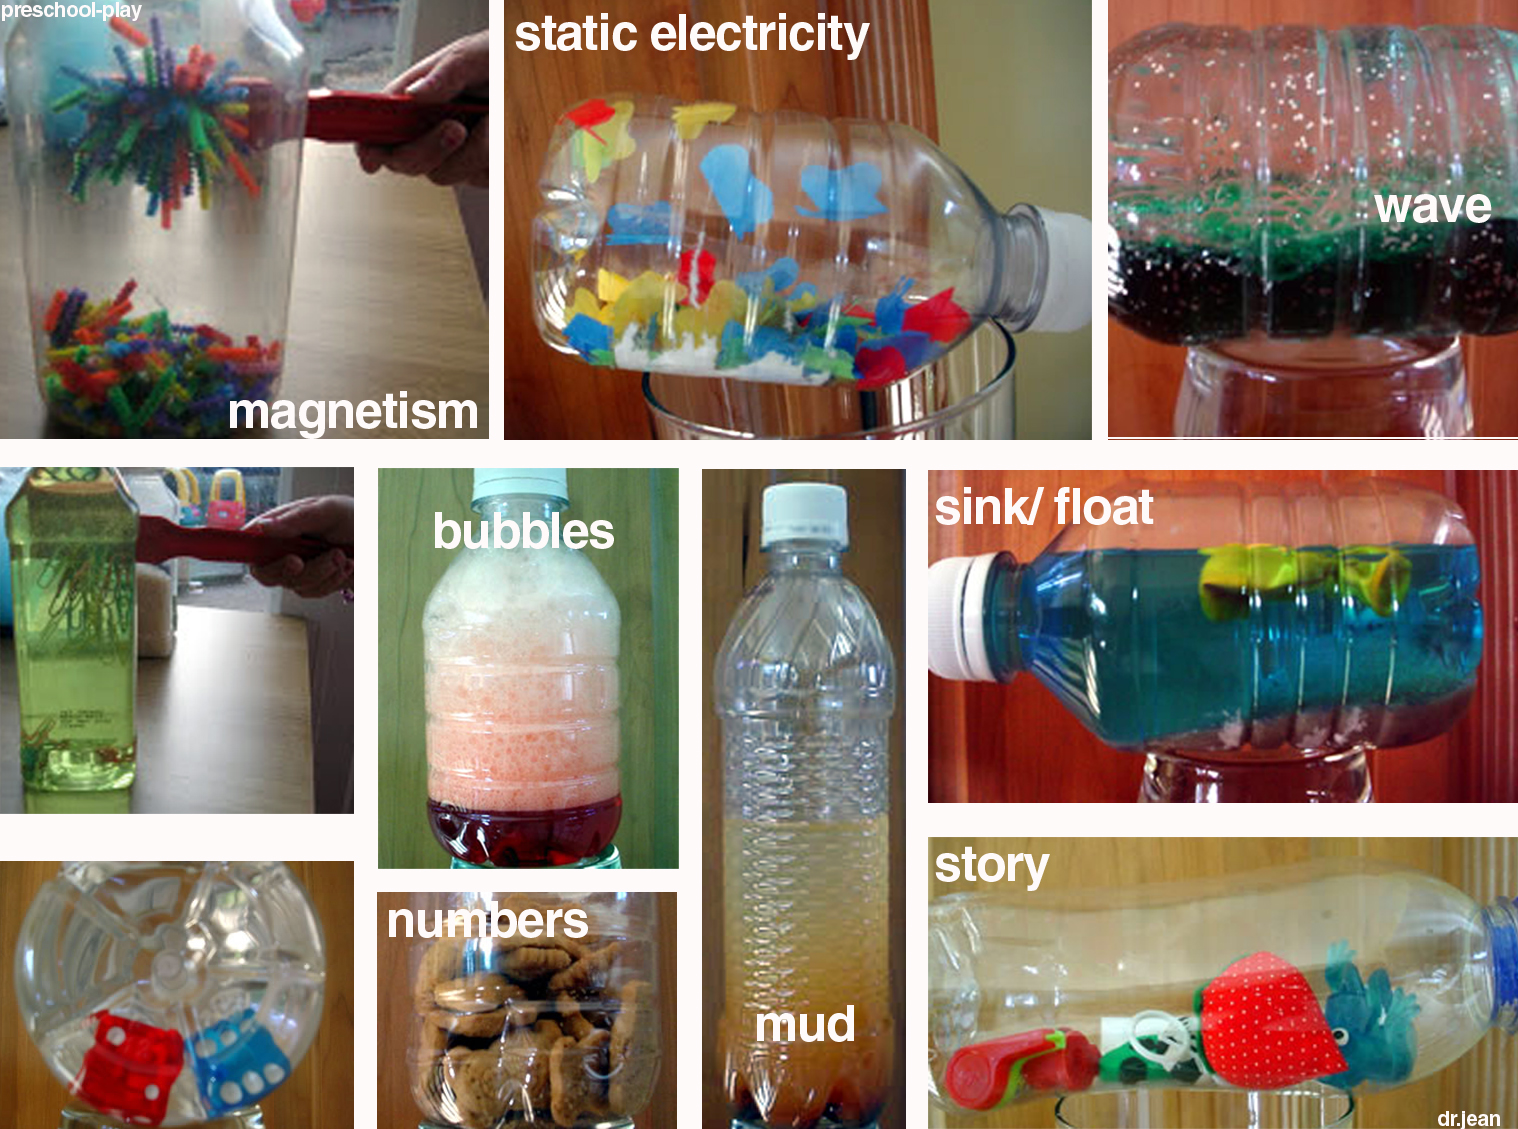
Discovery and exploration in a bottle, set up your own science lab! Dr. Jean and Preschool Play constructed the bottles featured above. Below are the instructions:
1. Magnetism- Can a magnet work through plastic? What happens when you add water?
2. Static Electricity- Tear pieces of tissue paper and styrofoam. Then, rub the bottle on wool, your head, or the carpet. What happens?
3. Waves- Create waves and motion in a bottle. (1/2 cup corn syrup, drop of color, and glitter)
4. Bubbles- Mix up 1/2 cup water, drop of dish detergent, and food coloring. Shake, what happened?
5. Mud- Can water and dirt make mud? (1/2 cup dirt, 2/3 full with water) Classify the water and the mud.
6. Sink / Float- What objects sink / float? (Beach Bottle in photo: Fill bottle with 3/4 cup sand, add water, drop of color, small objects, and a balloon.)
7. Numbers- Roll the dice and find the sum of the 2 numbers. Estimate how many objects are in the bottle.
8. Story- Put objects in a bottle and create a story from them!
visit Dr. Jean for more bottle ideas!
Tuesday, December 20, 2011
Colorful Ice Sculpture Science
 |
| photo credit: art and creativity |
Create colorful ice sculptures and see the science of mixing salt with ice! Art and Creativity shows how kids can make works of ice art by simply dropping liquid watercolor mixed with salt onto a chunk of ice! Science: Salt creates tunnels in the ice because it lowers the freezing point of water, causing the ice to melt. The colors make the tunnels pop, so we can see them better.
Also, check out We are Teachers to see how you can conduct this experiment with a large group of children!
Thursday, December 15, 2011
Snowflake and Ice Experiments
Examine, grow, melt, and cook with these four fun experiments:
 |
photo via Austin Kids Blog
|
Kids can see all snowflakes have 6 sides and not one looks the same!
materials:
black paper or black fabric
magnifying glass
instructions:
1. Place paper in the freezer for a few hours to prepare it. Then, put the paper outside on a snowy day.
3. Let some snowflakes land on it
4. Use the magnifying glass to see the snowflakes up close.
2. Experiment with Insulation and Ice
Cocopreme helped kids learn about thermal insulators and how they affect the temperature of ice.
Document what factor caused the ice to melt the fastest: salt, newspaper, or aluminum foil. Also, try other forms of insulation.
 |
photo via cocopreme
|
1. Put a big bowl outside to collect snow (8 cups)
2. Mix in a 14 oz can of sweetened condensed milk and either 1 tsp of vanilla extract or 1/4 cup to 1/2 cup of chocolate syrup (you can play around with ingredients)
Photo is from KSPR, click the link for more snow ice cream recipes!

4. Grow snowflakes in a bottle! Find out how at Snow Crystals by Ken Libbrecht.

Tuesday, December 13, 2011
Gumdrop Earthquake
Mr. Hansen's 7th grade Science class demonstrated "the effects of earthquakes on engineered structures." See who can build the strongest structure. Who's will last the longest through a fake earthquake?
Visit Exploratorium to find out how to build a strong, long lasting structure!
Sunday, December 11, 2011
Moon Sand, Space Putty, and Galaxy Dough

Moon Sand
materials:
6 cups of play sand
3 cups of cornstarch
1 1/2 cups of cold water
instructions:
1. Mix the water and cornstarch together
2. Mix in the sand, one cup at a time. You'll need to really work it in with your fingers.
3. Play with it!
When you're all finished, store in an airtight container.
When you play with it again, add 2-3 tablespoons of water
Space Putty
materials:
2 1/2 cups of liquid starch
1 cup of Elmer’s glue
Silver Glitter
Food coloring
instructions:
1. Stir the glue and 1 cup of starch together in a bowl.
2. Add a few drops of food coloring (optional)
3. Cover the bowl and let it stand overnight.
4. The following day, mix in 1-1 1/2 cup of starch, add glitter and play!
Galaxy Dough
Visit Fairy Dust Teaching
Friday, December 9, 2011
Geography: Passport Please...
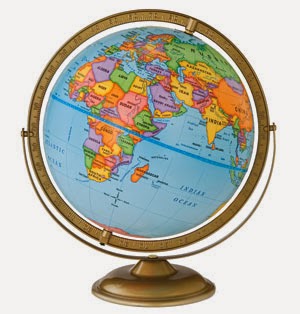
A fun geography project is to take your kids on a pretend trip around the world, to learn about other cultures and their history. Introduce kids to the food, music, geographic features, architecture, and language. Print out pictures and decorate your room to represent each country you visit. Send a stuffed animal around the world to different schools around the world, exchange souvenirs and postcards. For each country your animal visits, have his picture taken in front of a famous landmark or monument. To take the project even further, try to skype or ichat with schools from different countries. You can print out pretend passports and stamps, make airline tickets, and track your travels on a world map. Visit Making Friends for printable country fact cards. Note: You could also do this project nationally and learn about different states, corresponding with various schools from all over the U.S.
Monday, December 5, 2011
Christmas Soap!

Confetti Soap, all you need is glycerin soap and food coloring.
- First, you melt the glycerin in the microwave, add food coloring to 1/3 of your solution, stir
- Next, pour the solution out and let it get hard
- Once it hardens up, cut the soap into small pieces and add to your mold (sprayed with cooking spray).
- Pour the clear solution over your confetti pieces, let set, pop out, and enjoy!
- Choose trinkets to put inside your soap, then place them in an oiled ice cube tray or other soap mold
- Melt glycerin in the microwave
- Pour right over top of your trinkets and let set (trinkets will come out of the soap through washing)
Snowball Soap
- Grate Ivory brand soap with a cheese grater
- Add a little water, not too much.
- Mold the soap into a ball with your hands and let it set to harden
Enjoy your Christmas soap!

Saturday, October 29, 2011
Plastic Milk?!
 |
photo via Austin Kids
|
One cup of milk
4 teaspoons of white vinegar
how to:
1. Heat up the milk until it's hot
2. Pour the milk into a bowl
3. Add vinegar to the milk and stir for 1 minute
4. Dump milk through a strainer
5. Rinse the chunky milk in water and start molding it.
6. After you have made a design you like, let it harden. Then, you can paint it.
explanation: "When milk and an acid mix together, the milk begins to change properties. The milk begins to separate into a liquid and a solid. The solid material consists of minerals, fat, and a protein called casein. This protein is made of long molecules. Those molecules allow us to bend the lumps like rubber until it hardens and resembles plastic." - AustinKids.org
Sunday, October 23, 2011
Rocket Reactions!
First, make an explosion!
Now, make a rocket with a film canister! Kids end up with a stellar toy that they can reuse!
Science: "When you add the water it starts to dissolve the alka-seltzer tablet. This creates a gas call carbon dioxide. As the carbon dioxide is being released, it creates pressure inside the film canister. The more gas that is made, the more pressure builds up until the cap it blasted down and the rocket is blasted up." - Science Bob (click here for instructions)
Now, make a rocket with a film canister! Kids end up with a stellar toy that they can reuse!
Science: "When you add the water it starts to dissolve the alka-seltzer tablet. This creates a gas call carbon dioxide. As the carbon dioxide is being released, it creates pressure inside the film canister. The more gas that is made, the more pressure builds up until the cap it blasted down and the rocket is blasted up." - Science Bob (click here for instructions)
Tuesday, October 11, 2011
Rainbow Glitter Crayons

Don't throw those broken crayons away, recycle them!
1. Preheat your oven to 275
2. Spray a muffin pan with vegetable cooking spray
3. Fill the muffin pin with broken crayons (mix and match shades and colors- whatever you would like!)
4. Sprinkle glitter on top
5. Bake for about 10 min at 275 (check on them)
6. Take them out when they look melted through
7. Next, use a toothpick and create swirls
8. Let them completely cool down (you can put them in the freezer to speed the process)
9. Finally pop them out (tap the bottom of the pan to help) and you're ready to draw!
Blooms Recycled Paper

- You'll need to window screen/ frame for this
- Let all your scraps soak in water overnight
- Next, blend scraps in a blender
- Pour the scraps out and add water in a large, deep container
- Add flower seeds (Marigolds work really well)
- Dip your screen in and lift up
- Leave paper solution on the screen to dry overnight
- Once paper is completely dry, pull off of screen
- Cut your paper into squares and give to kids to plant!
Colored Cubes
The Colored Cube experiment is great for teaching kids primary and secondary colors. All you need is Sprite and colored ice cubes (2 red, 2 yellow, and 2 blue). Put a red and yellow cube in one cup, blue and yellow in a second cup, and red and blue in a third cup. Next, pour Sprite into all of your cups. Voila, kids see how primary colors mix in action! Below is an experiment my class conducted.


EGG-cellent Experiments!

Featured above:
Check out The h bar for lots of twists on the classic naked egg experiment!
Visit Toledo Imagination Station for an osmosis experiment! Kids shrink their naked egg with corn syrup. Then, they inflate it with water!
Click here for simplified instructions for Naked Egg Part 1 and Part 2
To learn all about eggs, check out Egg Fun!
Egg Geodes - crystallize an egg shell!
Monday, October 10, 2011
Rock Candy Science
 |
| photo via math and reading help |
Rock Candy Recipe, fun to watch and even more fun to eat! Below are two ways to create crystal candy!
Method 1 - Science Bob
materials:
1 cup water
2-3 cups sugar
wooden skewer or chopstick
clothespin
jar or tall glass
1. Pour 1 cup of water into a pot and bring to a boil
2. Add 1/4 cup of sugar and stir until dissolved
3. Slowly add more sugar and stir until dissolved
4. Remove from heat and let cool for 20 minutes
Optional - Divide solution into different bowls (the number of bowls depends on how many colors you would like). Add food coloring to each bowl (you can add flavoring as well if desired)
Optional - Dip half of skewer into the warm sugar solution and coat with granulated sugar (let it cool completely so the sugar is adhered)
5. Pour solution into your jar almost to the top
6. Dip the skewer into the jar straight down the middle (not touching the sides). The skewer should be 1 inch from the bottom of the jar
7. Clamp the clothespin on the skewer horizontal, so it lays on top of the jar to balance the skewer.
7. Let the jar cool and place in a safe spot
Watch the crystals grow!
Method 2
Note: Instead of using a skewer and clothespin, you can also try this method:
- While sugar solution is cooling, take a pencil and tie cotton string to the center of it
- Dampen the string with your sugar solution, then dip in regular sugar (let dry)
- Dampen the string with your sugar solution, then dip in regular sugar (let dry)
- Pour sugar solution into your jar, suspend the string into the jar, and let the pencil lay flat on top
- Cover the jar with a paper towel to keep it clean
- Allow your crystals to grow 3-7 days
Soap Souffle!
Ivory Soap is the soap that floats! It contains air pockets. The microwave heats the air and water inside of it. The water vaporizes and the air expands, changing its physical state. You can conduct an experiment with Ivory Soap and another bar brand. Ivory puffs due to the air inside, while others will simply melt. (Microwave for 90 seconds to 2 minutes on a plate). Another experiment you can try is testing Ivory soap against another bar brand in a bowl of water. Ivory will float, while others will sink. You'll need 2 fresh bars of soap. Legend behind floating soap @ Ivory. For more science behind the experiment visit Steve Spangler!
Sunday, October 9, 2011
Soda Straw Oboe
 |
illustration via sciencebuddies.org
|
Elephant Toothpaste
Create a giant tube of an overflowing stream of "toothpaste." For written instructions, visit Science Bob!
Balloon Rocket Race
 Kids love balloon rocket races! Left is one I conducted in my classroom.
 materials: 2 Balloons, 2 (10-15") pieces of string, 2 plastic straws, tape
1. Tie one end of the string to a chair.
2. Put the other end of the string through the straw.
3. Stretch the string tight and tie it to another chair.
4. Blow up the balloon. Hold the end of the balloon and tape the straw on top of the balloon. You're ready for launch!
5. Let go and watch the rocket fly! Visit Science Bob for the explanation!
Add a little math to this science project by measuring different lengths of string. Does longer string produce better, faster results than shorter string?
Scientific Sound Effects

 Make a balloon scream with a hex nut or coins! Visit Steve Spangler for the explanation behind screaming science! For screaming balloon instructions click here!
Fun with Mentos

All you need is Diet Coke + A roll of Mentos Mints. Make sure you add ALL of the Mentos at once, inorder to get a high explosion!
Lava Lamp!

materials:
soda bottle
3/4 cup of water
vegetable oil
Alka Seltzer
food coloring
instructions:
1. Pour water into the bottle.
2. Add vegetable oil into the bottle until it's almost full. Let the oil and water separate.4. Add 10 drops of food coloring.
3. Break the tablet in half and drop the half tablet into the bottle. To keep the effect going, just add another tablet piece. Shine a flashlight through the bottom of the bottle and turn off the lights!
3. Break the tablet in half and drop the half tablet into the bottle. To keep the effect going, just add another tablet piece. Shine a flashlight through the bottom of the bottle and turn off the lights!
Slime Experiment- Elmers Glue/ Borax
Use Elmer's gel glue for translucent slime. For a matte slime, use regular Elmer's. Visit Steve Spangler for directions! Click here to see how you can use slime to simulate the movement of a glacier!
Subscribe to:
Posts (Atom)